Legal Professional Desk Accessories That Fit, Lock, and Scale
By Sora Tanaka • 29th May
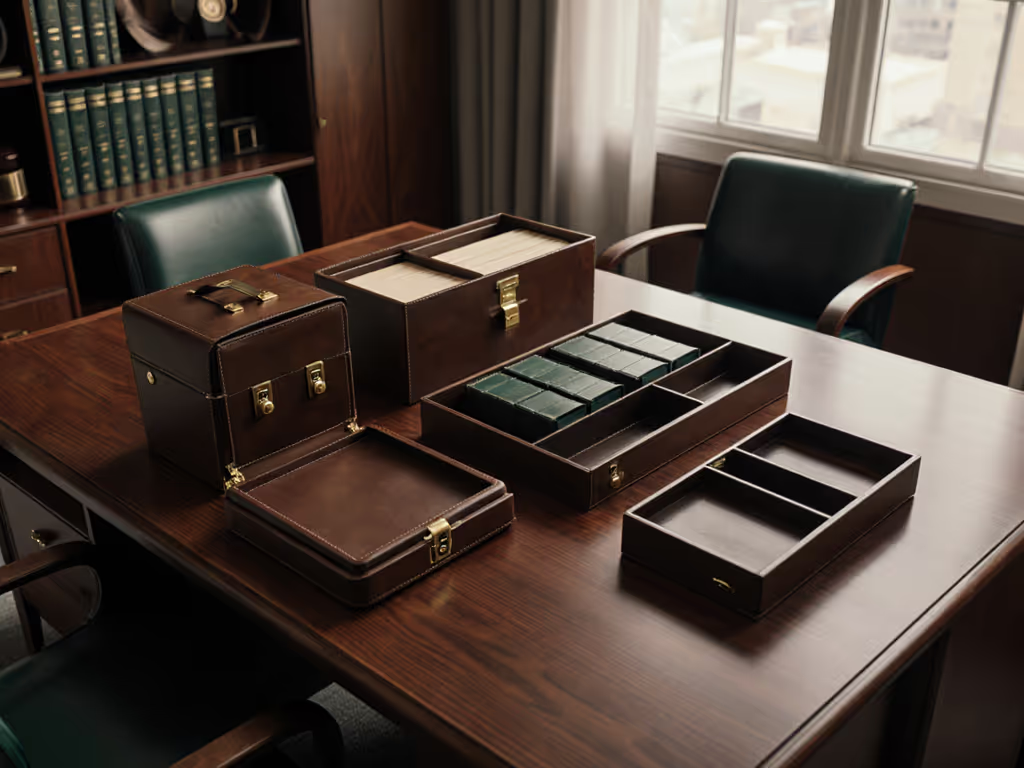
Legal work punishes sloppy setups. Legal professional desk accessories are not decor; they are load-bearing infrastructure for deadlines, confidentiality, and courtroom prep. The goal is a grid-planned workspace where your lawyer workspace essentials fit on day one, lock when they must, and scale when your caseload and gear grow.
Most lawyers I work with are not short on tools; they are short on fit. Drawers collide with chair arms. Clamp-on trays hit crossbars. New monitor arms block document space. The fix is not buying "better accessories"; it is treating your desk like a drafting problem: plot, measure, then install.
Blueprint the underside; future upgrades stop colliding and start flowing.
This step-by-step guide walks you through:
- Mapping your legal workflow into zones
- Measuring and grid-mapping your desk (top and underside)
- Choosing document, research, cable, and security accessories that physically fit
- Building a lockable, courtroom-ready configuration that can scale to more screens and gear later
I will compare common accessory types the way a lawyer compares arguments: by dimensions, constraints, and future implications - not marketing language.
Step 1: Map Your Legal Workflow Into Zones
Before you buy a single accessory, you need a workflow map, not a shopping list.
1.1 Identify your primary modes
For most attorneys, the workday rotates through these modes:
- Deep drafting - long-form writing in Word or a DMS
- Legal research - multiple windows, split screens, secondary references
- Document review - printed exhibits, contracts, discovery sets
- Client/partner calls - video, notes, calendar, CRM
- Courtroom prep - packing exhibits, charging devices, syncing notes
Your first task: assign each mode a primary surface area on your desk. If video presence is core to your client work, see our video call desk essentials for camera, lighting, and audio placement that won't collide with your document zones.
- Where do printed documents actually sit when you're moving fast?
- Where do you like your reference materials? Left, right, or vertical in front?
- When you take a call, where does your notebook go? Where does your keyboard move, if at all?
You are building a zoning plan:
- A-zone: keyboard, primary monitor(s), everyday pen/notepad
- B-zone: active case documents (today's matter)
- C-zone: reference and long-term files, less frequent reach
1.2 Mark what must lock and what must move
Next, tag your items:
- Lock-required: client files, signed originals, devices with case data
- Privacy-required (but not necessarily locked): active printed briefs, draft notes visible on camera
- Mobile: laptop, tablet, legal pad you bring to court
You are designing three layers:
- Locked layer - anything that must be secured at rest
- Visible-but-guarded layer - what needs privacy screens or physical shielding
- Quick-grab layer - courtroom-ready items that must pack and repack efficiently
Everything that touches confidential paper belongs to a deliberate storage or shielding solution. General office accessories from big-box stores rarely consider those legal constraints; specialized legal suppliers do, but still require fit planning.
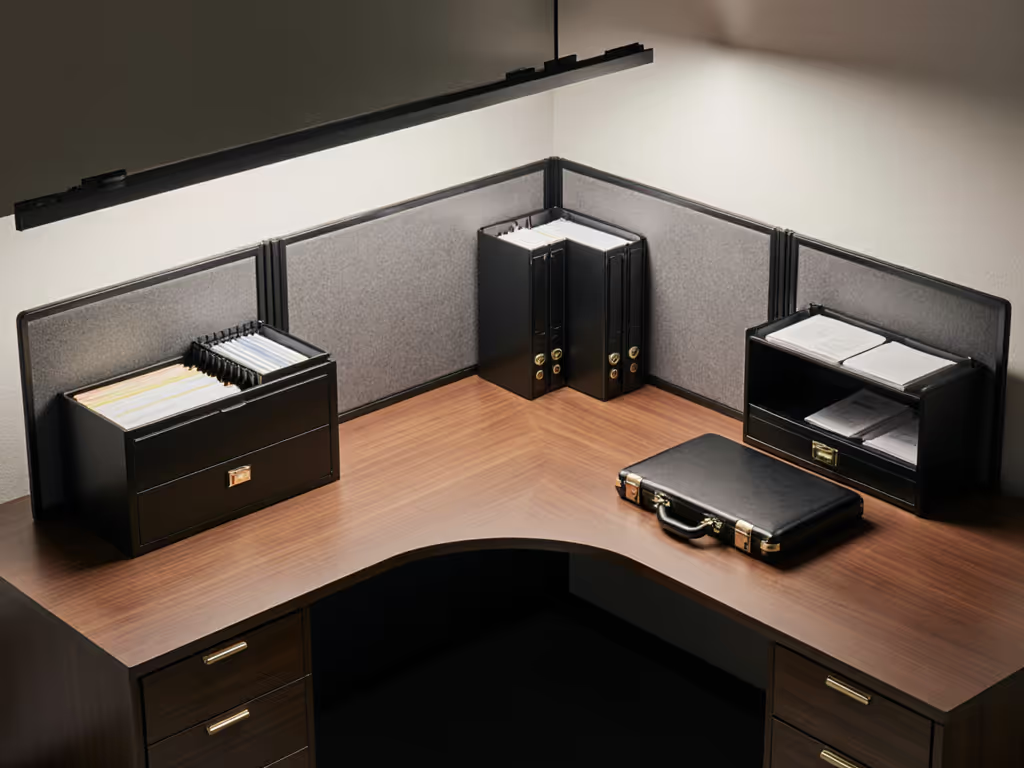
Step 2: Measure and Grid-Map Your Desk (Top and Underside)
If you skip this step, you are guessing, and guessing is how a "compact" keyboard tray ends up blocking your filing drawer by 10 mm.
2.1 Capture core dimensions
Write these down; do not estimate:
- Desk width (left to right)
- Desk depth (front edge to wall)
- Desk thickness (important for clamps)
- Leg positions and widths
- Crossbar locations on standing desks (front-to-back and left-to-right)
- Drawer positions and travel (how far they extend)
- Chair armrest height and width at typical sitting position
If your desk is shallower than ~24 in / 60 cm, you must be ruthless about front-to-back space: full-size keyboard trays, large document stands, and deep monitor bases will fight each other.
2.2 Build an underside map
Flip your perspective: the underside is where rails, cable trays, docks, and locking drawers live.
On paper or in a notes app, sketch a rectangle and:
- Mark legs and crossbars to scale
- Mark grommets and any pre-drilled holes
- Draw a 10 cm / 4 in grid across the underside (these are your grid coordinates)
Every under-desk accessory you buy should be placed on this grid:
- A locking drawer might occupy (A3-D5) on your map
- A cable tray might span (E1-H1)
This lets you run collision audits:
- Will a keyboard tray at (B1-E1) collide with your chair arms at full extension?
- Will a locking drawer at (F2-H4) hit the desk leg or crossbar hardware?
I once rebuilt a setup where a new triple-monitor arm overlapped an existing raceway by roughly a centimeter. On paper that is trivial; in real steel and MDF, it is complete failure. After re-plotting everything on a grid, the solution was obvious: shift the raceway by one grid cell and mount the arm base in the cleared zone. That is the power of discrete coordinates.
2.3 Note mounting depth and clearances
When evaluating accessories, you want three numbers ready:
- Available clamp range: min and max thickness your desk supports
- Mounting depth: how far the accessory extends under the desk
- Clearance to your knees and chair arms: lowest safe point under the desktop
Any spec sheet that does not list clamp range or mounting depth is a risk. As a rule, Leave room for your next device. If a drawer or tray fills every millimeter of under-desk space, it will block your next upgrade.
Step 3: Choose Your Document Layer - Locking, Reachable, Court-Ready
Legal practice lives on paper, even in cloud-first firms. The question is not "file cabinet or no?" but which document accessories match your case mix and space.
3.1 Three main document storage archetypes
Use this table to compare.
| Accessory type | Best for | Fit risks | Lock/Privacy | Scaling & mobility |
|---|---|---|---|---|
| Under-desk locking drawer | Solo attorney or small caseload needing secure, daily-reach files | Collides with chair arms, crossbars, or knees if mounting depth ignored | Key or combo lock; keeps files out of sight | Great for modest volume; limited if you routinely keep entire matters in paper form |
| Desktop file organizer with lockable cover | Active matters that must be front-and-center | Consumes A-zone surface depth if oversized; can block monitor height adjustment | Some models include lockable lids; still visible on desk | Easy to reconfigure; not ideal for large volumes or shared spaces |
| Mobile, lockable pedestal/cart | Higher volume paper or multi-user access in hybrid office | Requires floor space beside or under desk; watch chair clearance | Full-size locks; can store devices plus files | Scales well; can be rolled near you for trial prep, then stored away |
Under-desk locking drawer: what to measure
Look for:
- Interior height: at least ~10 in (25 cm) for upright letter-size folders
- Mounting depth: should leave at least 6–8 in (15–20 cm) of free space behind for cables and your legs
- Mounting pattern: verify screw locations vs. your underside map
If you are a renter or cannot drill:
- Consider clamp-on locking drawers that grab the front edge
- Pair with a mobile, lockable file box that can live in a closet when not in use
Do not let any drawer intrude into your primary knee space. That is prime real estate for future accessories (like a CPU holder or a sliding dock).
Mobile pedestal: courtroom-friendly configuration
For litigators, a pedestal can double as a courtroom-ready workspace solution:
- Top drawer: pens, highlighters, sticky tabs, chargers
- Middle: active case binders
- Bottom: long-term storage or boxed exhibits
Because it rolls, you can stage it near your desk for prep, then wheel it to your car or front door. Just ensure:
- Handle height + loaded weight are compatible with your building's elevators and door thresholds
- It can tuck fully under the desk without hitting crossbars
Step 4: Legal Research Desk Organization That Preserves Your A-Zone
Research workflows sprawl fast: casebooks, printouts, dual monitors, note pads. The trick is vertical and lateral organization that doesn't steal keyboard real estate.
4.1 Core research accessories
Key attorney-focused productivity tools for research mode:
- Slim vertical file sorter in the B-zone for today's matters
- Tiered paper tray for "in," "pending signature," and "to file"
- Document stand that holds a brief at eye level next to your monitor
- Monitor riser with integrated document slot for citations and printouts
Compare these research organizers: If you also need screen height plus storage, see monitor stand vs shelf riser for stability, weight limits, and cable pass-throughs.
| Organizer | Strength | Fit considerations | Best placement |
|---|---|---|---|
| Slim vertical sorter | Keeps active matters separate without stacking | Depth under ~4–5 in (10–13 cm) preserves space on shallow desks | Behind keyboard, to non-dominant side |
| Tiered tray stack | Clear status lanes (in/pending/out) | Needs more depth and vertical clearance; can crowd monitors | Far edge of desk or on cabinet, not center stage |
| Document stand / copy holder | Eye-level view reduces neck strain; great for cite-checking | Base footprint: ensure it doesn't push keyboard too close to you | Between monitor and non-dominant side edge |
| Monitor riser with slot | Saves space; combines stands and sorting | Check riser height vs. ergonomic eye line | Directly under main monitor |
4.2 Avoiding collisions with arms, mics, and laptops
Common conflicts:
- A mic boom that swings through the same arc as your document stand
- A laptop on a stand blocking the top of a legal pad or reference book
- A monitor arm base that sits exactly where your vertical sorter needs to live
Use your grid approach on the top surface as well:
- Divide your desk into front-to-back bands: writing, keyboard, monitor bases
- Assign fixed coordinates for each accessory: e.g., document stand at (right, mid-band)
When you add new devices (a second monitor, an overhead light), you have predefined expansion slots where accessories can shift without breaking your entire layout.
Step 5: Cable, Power, and Docking - The Silent Caseload
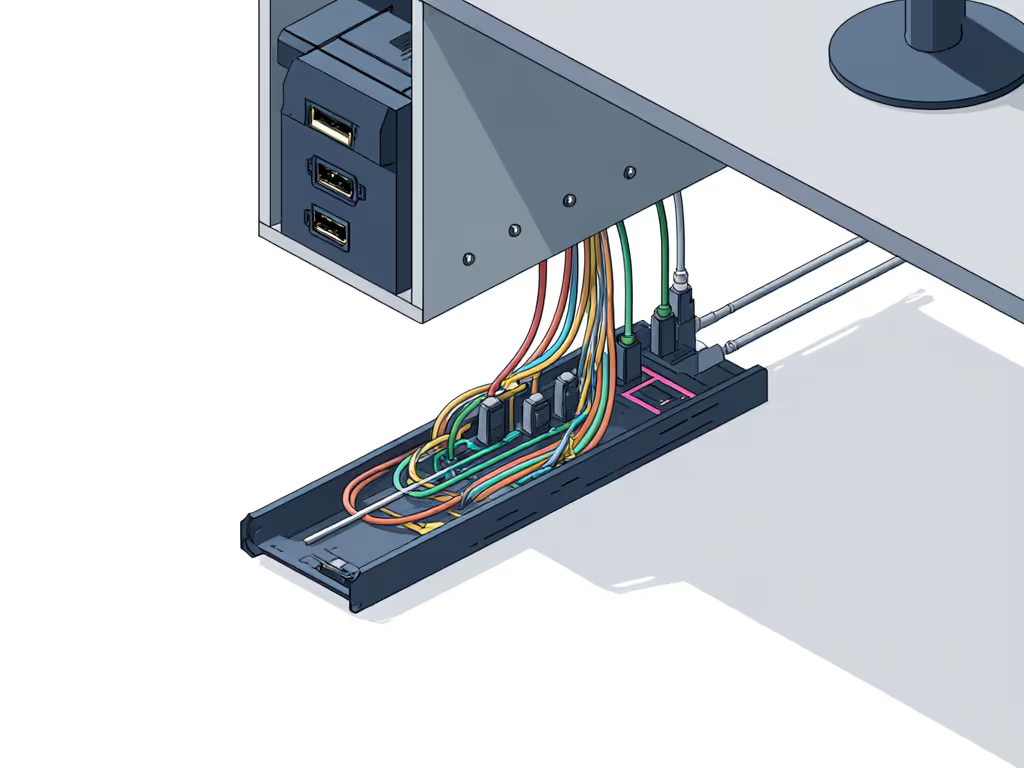
Cable chaos is not cosmetic for lawyers; a snagged power cable during a remote hearing is a risk event. For product-level comparisons, use our cable management systems guide to match trays, raceways, and rails to your underside map. You need a deliberate power and data layer under your desk.
5.1 Plan power and data routes
On your underside map, draw:
- Primary power strip location - ideally rear-center for even cable runs
- Docking station - under-desk mounted or behind a monitor
- Vertical drops - where cables fall from desk to floor or rise from floor to desk
Your goals:
- Only one or two visible cable drops to the floor
- All high-voltage cables secured along rails or trays, never hanging loose
5.2 Compare under-desk cable management options
| Solution | Description | Pros | Fit risks | Renter-friendly? |
|---|---|---|---|---|
| Clamp-on metal cable tray | Basket or channel that clamps to desk edge | No drilling, easy to reposition | Requires clear edge length; clamp may hit legs or crossbar | Yes |
| Screw-mounted raceway | Metal or plastic channel screwed under desk | Very secure, low profile, customizable length | Requires drilling; alignment must avoid crossbars | No (unless you own the desk) |
| Modular rail with clip-on accessories | Rail screwed or clamped; power strip brackets and trays attach to it | Highly scalable; accessories slide along rail as layout changes | Rail must be precisely placed; slightly higher install effort | Yes, if clamped; no if screwed |
For renter limitations, favor clamp-based systems or rails that attach to existing threaded inserts under pre-drilled desks.
5.3 Dock placement and mounting depth
For multi-monitor or laptop + monitor setups, a dock is your control center. Compare integrated power-and-data options in our smart desk hubs comparison to reduce cable count and free expansion ports. You have three main placements:
- Back of monitor - uses VESA mount or adhesive bracket; cleans up cables
- Under-desk dock shelf - mounted just under the front edge for easy port access
- Desktop stand - visible but easiest to access and troubleshoot
Consider:
- Cable length from dock to monitors and laptop
- Mounting depth so the dock shelf doesn't intrude into knee space
- Space for future peripherals (external drives, card readers, webcams)
Again: Leave room for your next device. Mount the dock where you can add one more HDMI, one more USB hub, without ripping the whole system out.
Step 6: Privacy, Security, and the "Lock" Layer
Legal practice is bound by confidentiality. Your desk should enforce that with confidential document management tools and privacy solutions that integrate with everything above.
6.1 Screen privacy options compared
| Privacy solution | How it works | Pros | Trade-offs | Best use case |
|---|---|---|---|---|
| Clip-on privacy filter | Physical filter narrows viewing angle | Easy to add/remove; no adhesive | Can slightly dim or alter colors | Laptops and primary monitors used in shared spaces |
| Magnetic privacy filter | Magnet frame attaches to metal bezel | Faster on/off; cleaner look | Requires compatible bezel; more expensive | Hybrid workers moving between office and home |
| Monitor hood | Surrounding shroud blocks side/top view | Very effective in bright or public rooms | Bulky; may conflict with webcams/lights | Fixed desks facing open areas or glass walls |
For remote hearings, combine:
- A privacy filter on your main display
- A disciplined window layout that keeps case materials on the shielded screen
- A camera crop and background that never reveals physical documents
6.2 Locking small items and devices
Your courtroom-ready workspace solutions must account for:
- External drives with discovery
- Backup phones or hotspots
- Stamps, checkbooks, secure tokens
Options:
- Lockable under-desk drawer with internal organizer
- Lockable desk box sized for drives and passports, anchored via cable lock
- Safe-grade box stored in a closet or locked cabinet for higher-risk items
Plan their location so that:
- You can reach them while seated without standing up mid-call
- They do not block future installation of a keyboard tray or CPU holder
6.3 Paper lifecycle: from intake to shred
Design a paper flow that never leaves sensitive documents in limbo:
- Intake tray: where new mail or printouts land
- Active slot: a labeled section in your vertical sorter or locking drawer
- Archive or scan: a dedicated moment in your weekly schedule
- Shred bin: a closed container next to or under your desk
Place your shredder or locked shred bin in C-zone - reachable but not where you'll kick it. The bin's footprint must be on your floor plan the same way a pedestal or chair is.
Step 7: Scaling - From Today's Caseload to Next Year's Stack
Most lawyers' gear grows: a second monitor, a better camera, a dedicated mic, maybe an e-ink tablet. If your current lawyer workspace essentials are "just barely" fitting, your next upgrade will cause collisions.
7.1 Reserve expansion slots
In both your top and underside maps, mark:
- Future monitor arm base locations
- Spare rail length on your under-desk cable system
- Empty power outlets for a future dock or charger
Treat these as protected space - do not fill them with permanent accessories.
A good rule: never let any single accessory extend more than two-thirds of the way across your desk width or depth. That remaining third is your expansion buffer.
7.2 Multi-monitor sequencing for legal work
For research-heavy or litigation practice, dual monitors are almost mandatory; many move to three. To keep this scalable:
- Use VESA-compatible arms so you can swap panels without changing arms
- Choose arms with stated weight and size ranges that cover your planned future monitor
- Mount arms so the bases do not overlap your planned raceway or locking drawer zones
If your desk backs to a wall, measure wall clearance behind the monitor to avoid arms hitting the wall before reaching your ideal viewing distance.
7.3 Lighting and focus tools
A well-planned light layer supports energy and eye comfort: Pick task lights with verified CRI and glare control using our desk lamp comparison tested for legal work scenarios.
- Monitor light bar - illuminates documents and keyboard without glare
- Adjustable desk lamp - for highlighting physical exhibits
- Timer or focus tool - a quiet timer, not a beeping alarm, to manage deep work blocks
Mount or place these where they do not:
- Cast glare on glossy document sleeves
- Hit your monitor frame when adjusted
- Block your ability to add a future webcam or overhead light
Again, think in grid coordinates: the light occupies (left, back band), leaving (center, back band) free for a future camera.
Step 8: Your 45-Minute Upgrade Sprint (Actionable Next Step)
You do not need a weekend to get control. Spend the next 45 minutes executing a mini-plan:
- 10 minutes - Map and measure
- Sketch your desk (top and underside).
- Mark legs, crossbars, drawers, and chair arms.
- Write down width, depth, thickness, and main clearances.
- 10 minutes - Tag your critical items
- Make three lists: must lock, needs privacy, goes to court.
- Circle anything currently living in piles on your desk.
- 10 minutes - Decide on one document solution
- Choose between: under-desk locking drawer, desktop organizer with lockable cover, or mobile pedestal.
- Check its dimensions against your map before adding it to your cart.
- 10 minutes - Plan cable and dock layout
- Pick a primary power strip location and a dock position.
- Decide whether a clamp-on tray, screw-in raceway, or modular rail fits your underside map and renter status.
- Mark at least one expansion slot on the rail for a future device.
- 5 minutes - Add privacy and lock layer
- Choose a screen privacy option (clip-on or magnetic).
- Choose a lockable drawer/box for drives and sensitive small items.
- Confirm both fit without colliding with legs, arms, or your future keyboard tray.
Once you have these decisions sketched, and dimensions matched, you can buy with confidence. Your legal professional desk accessories will not be random upgrades; they will be components in a mapped system that fits today, locks what must be locked, and scales gracefully as your caseload, monitors, and tools grow.
Blueprint the underside; future upgrades stop colliding and start flowing. And always, Leave room for your next device.
Related Articles